Install & Set-up Yeco
Install & set up for Windows
You can download this guide as a PDF by clicking here
Download Yeco from our site and run the installer. It will take you step by step through the installation. You will also receive an email from us with your licence key.
How to Activate your Licence
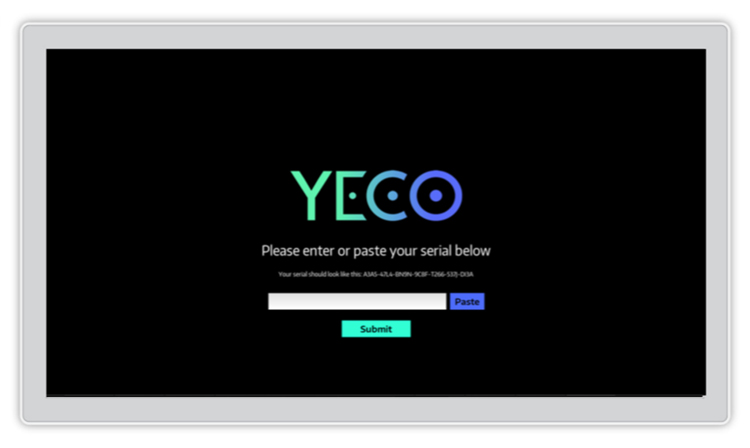
Step 1 – Copy the licence number you received in your email
Step 2 – Press the Paste button
Step 3 – Press the Submit button
How to install remote scripts on Windows
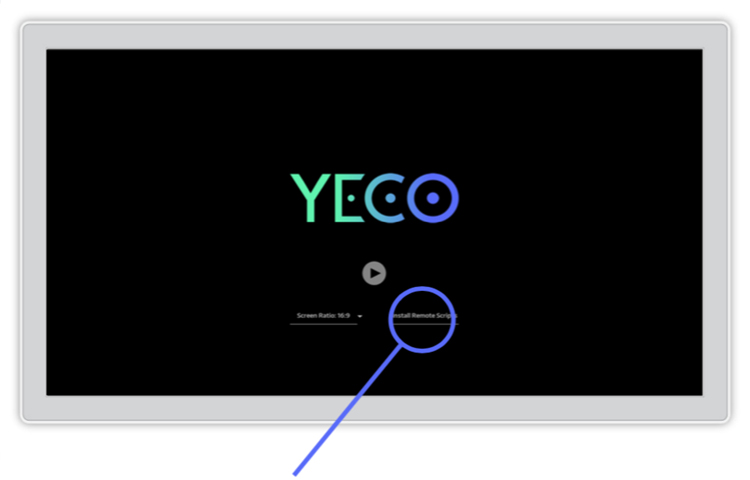
Step 1 – Press ‘Install Remote Scripts’ on the home screen
Use the Filebrowser to locate your Ableton Installation directory. The usual location is ProgramData -> Ableton
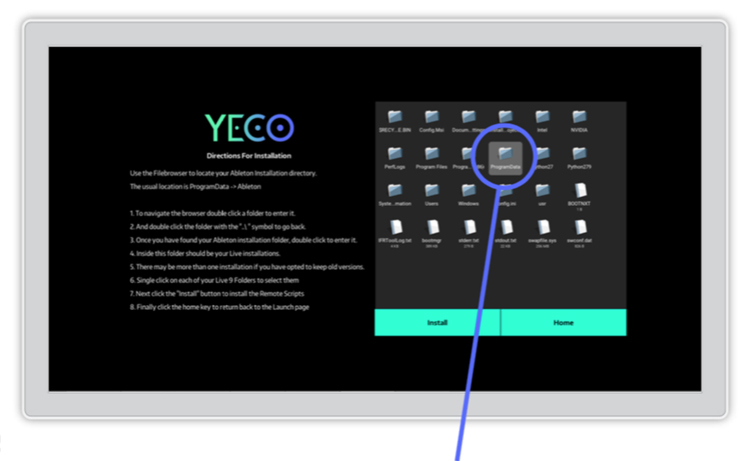
Step 2 –To navigate the browser DOUBLE CLICK a folder to enter it.
You can DOUBLE CLICK the folder with the “..\ “ symbol to go back.
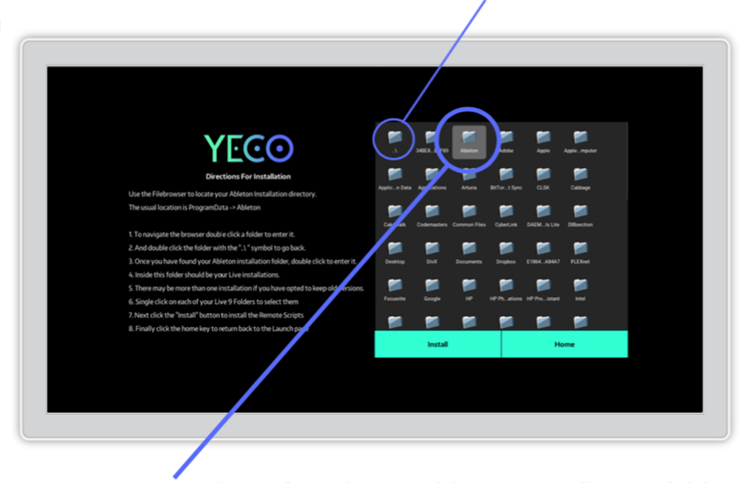
Step 3 – Once you have found your Ableton installation folder, DOUBLE CLICK to enter it.
Inside this folder should be your Live installations. There may be more than one installation if you have opted to keep old versions.
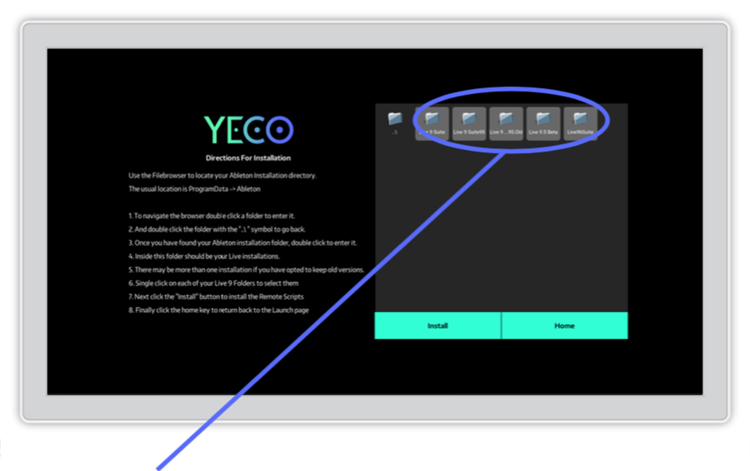
Step 4 – SINGLE CLICK on each of your Live 9 Folders to select them
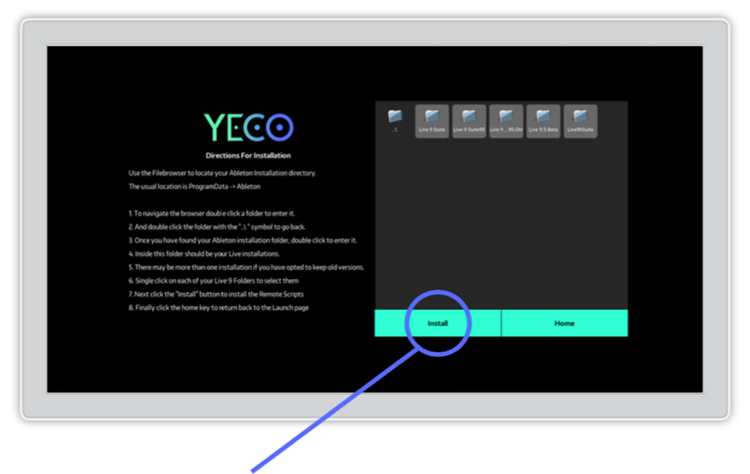
Step 5 – Click the “Install” button to install the Remote Scripts
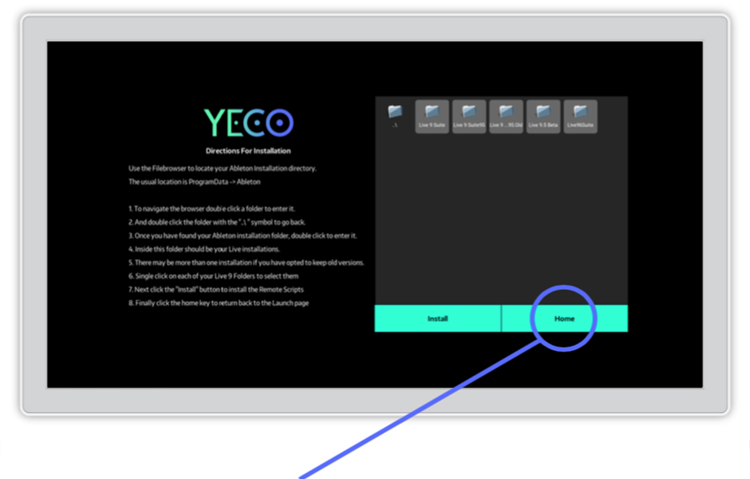
Step 6 – Click the “Home” key to return back to the Launch page
Step 7 – Launch Ableton Live or restart if it is already running
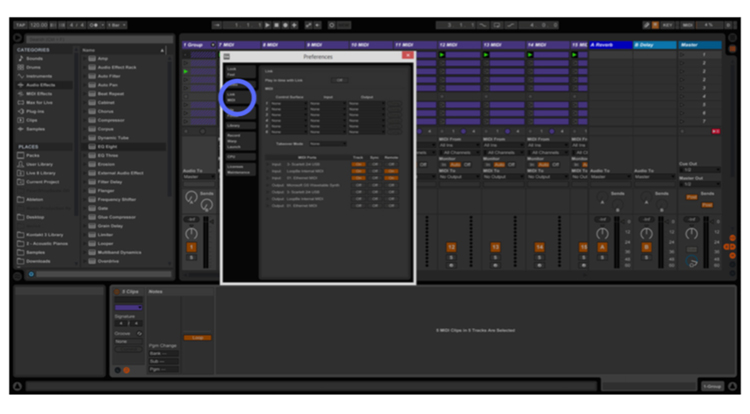
Step 8 – Navigate to preferences: Options -> preferences on Windows
Step 9 – On the preferences panel go to the MIDI settings
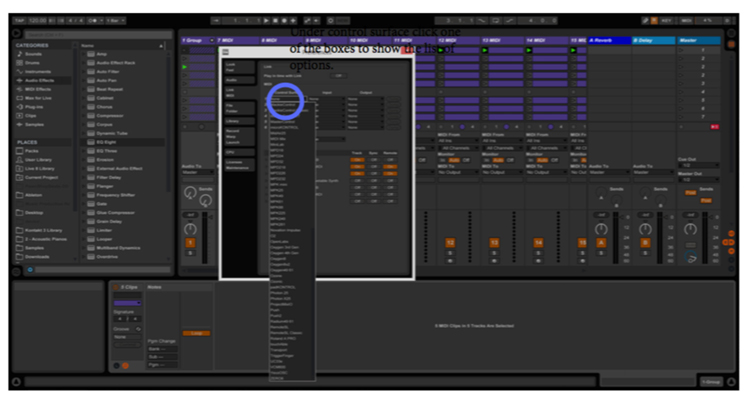
Step 10 – Under 'control surface' click one of the boxes to show the list of options.
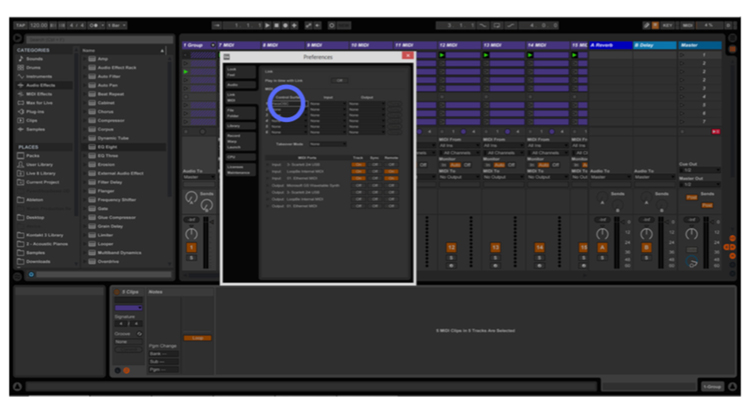
Step 11 – Select YecoOSC from the list
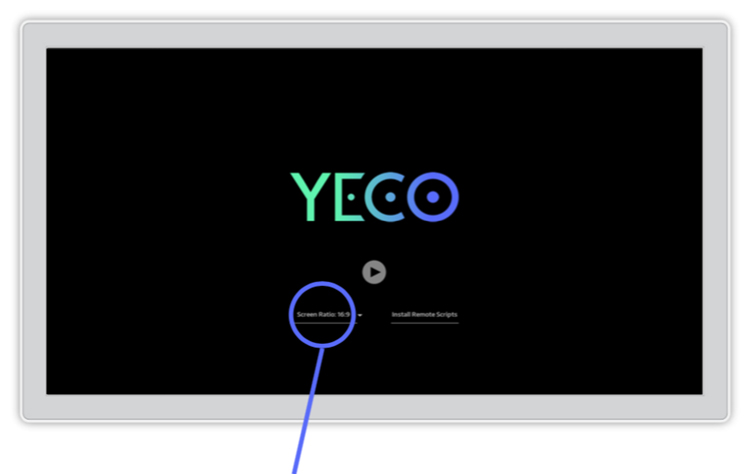
Step 12 – Choose your Screen Ratio from the dropdown
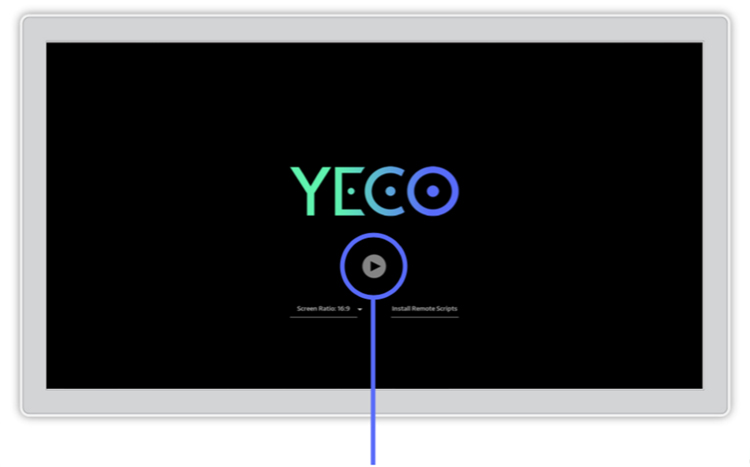
Step 13 – Press the play button to launch
MIDI on Windows
In order to use Yeco’s MIDI controllers on Windows it is necessary to use a virtual MIDI driver.
We recommend loopMIDI by Tobias Erichsen: http://www.tobias-erichsen.de/software/loopmidi.html
The other popular option is loopbe1 from nerds.de: http://www.nerds.de/en/loopbe1.html
Step 1 – When you have downloaded and installed your virtual MIDI driver go to Ableton’s preferences Options -> Preferences
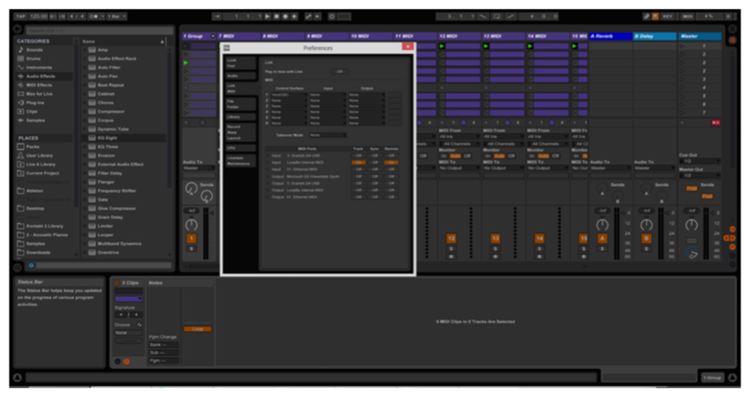
Step 2 – On the preferences panel go to the MIDI settings
Step 3 – Under MIDI ports locate the input from your virtual MIDI driver
Step 4 – Set the Track and Remote buttons to the “on” position
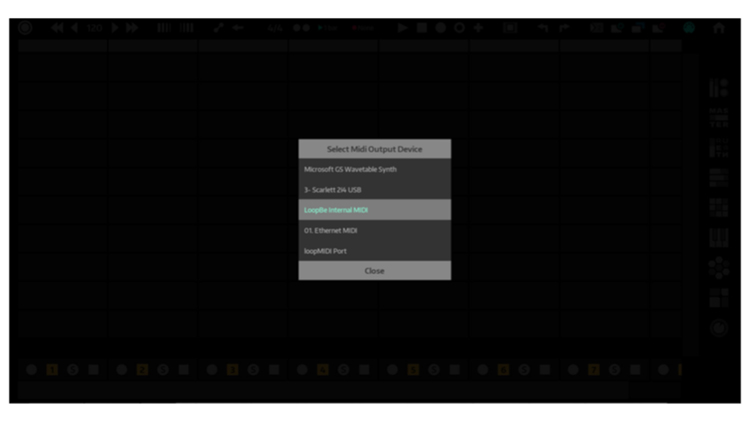
Step 5 – Then in Yeco press the MIDI button in the toolbar
![]()
Step 6 – Select your virtual MIDI driver from the list
THAT'S IT! We hope you enjoy using Yeco
Jump back up to install for Windows
Install & set up for Mac
You can download this guide as a PDF by clicking here
Step 1 – Mount the .dmg by double clicking it
Step 2 – Drag the Yeco app into the Applications folder
Launching Yeco for the first time on a Mac
Apple has a built-in way to protect you from opening up potentially malicious apps on your computer in Mac OS X Lion, Mountain Lion, Mavericks, Yosemite, and El Capitan. This setting, named Gatekeeper may stop you from launching Yeco.
If you get a warning when you try to launch Yeco simply Control+Click on the app in the Finder, then select “Open.”
You’ll see a new popup asking if you’re sure you want to run the app on your Mac. Just hit “Open” again and you’re set.
How to Activate your Licence

Step 1 – Copy the licence number you received in your email
Step 2 – Press the Paste button
Step 3 – Press the Submit button
How to install remote scripts on Mac

Step 1 – Press ‘Install Remote Scripts’ on the home screen
Use the filebrowser to locate your Ableton Live app. The usual location is the applications directory
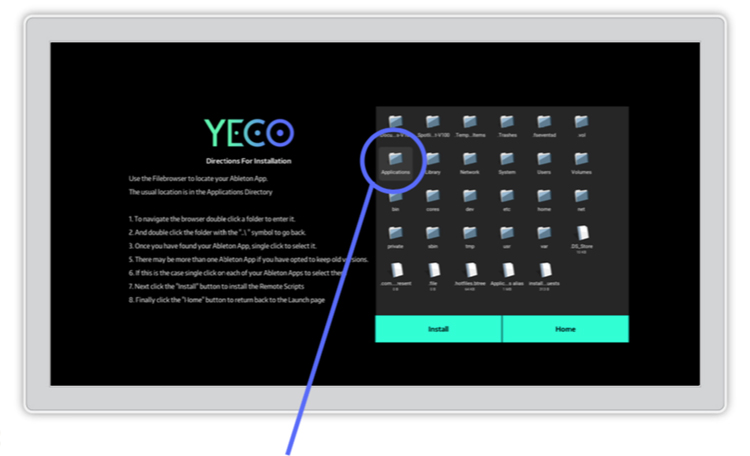
Step 2 – DOUBLE CLICK the Applications folder
You can DOUBLE CLICK the folder with the “..\ “ symbol to go back.
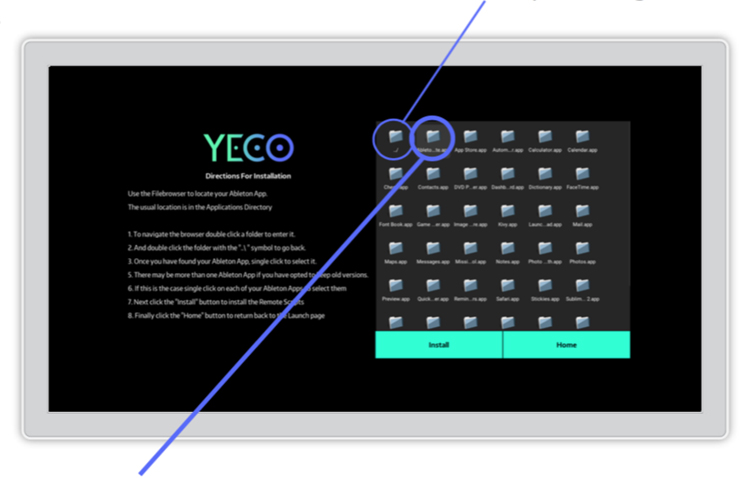
Step 3 – Once you have found your Ableton app folder, SINGLE CLICK to select it
There may be more than one installation if you have opted to keep old versions. If that's the case follow step 4, if not, skip to step 5.
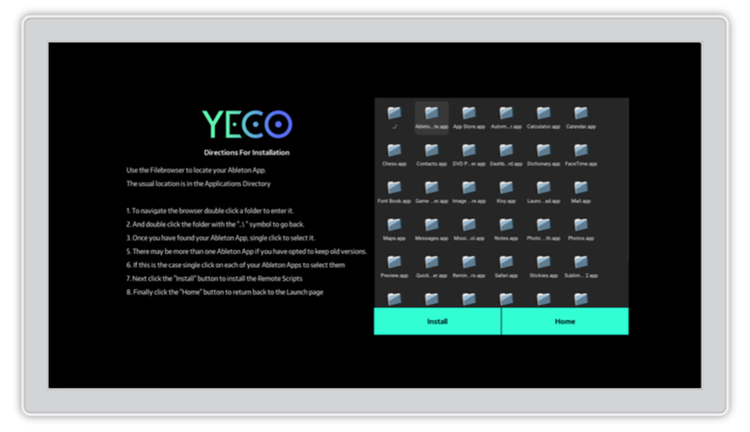
Step 4 – SINGLE CLICK on each of your Ableton app folders to select them
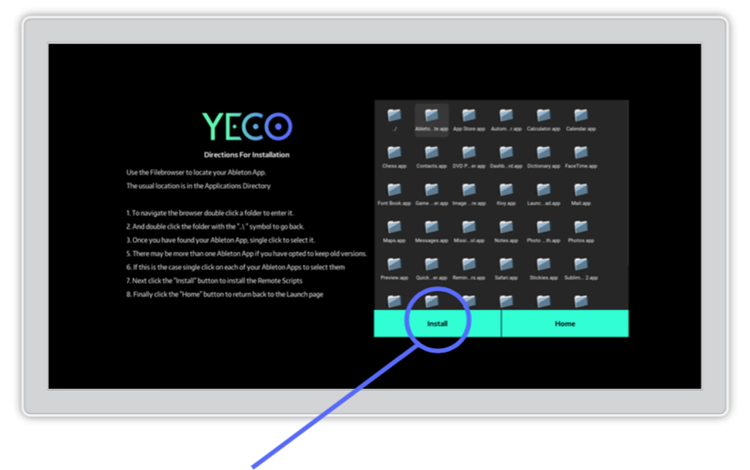
Step 5 – Click the “Install” button to install the Remote Scripts
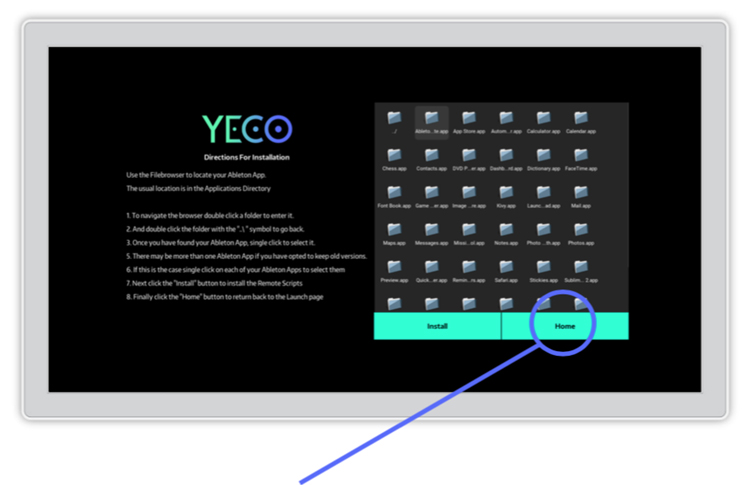
Step 6 – Click the “Home” key to return back to the Launch page
Step 7 – Launch Ableton Live or restart if it is already running

Step 8 – Navigate to preferences: Live -> Preferences on Mac
Step 9 – On the preferences panel go to the MIDI settings

Step 10 – Under 'control surface' click one of the boxes to show the list of options.

Step 11 – Select YecoOSC from the list

Step 12 – Choose your Screen Ratio from the dropdown

Step 13 – Press the play button to launch
MIDI on Mac
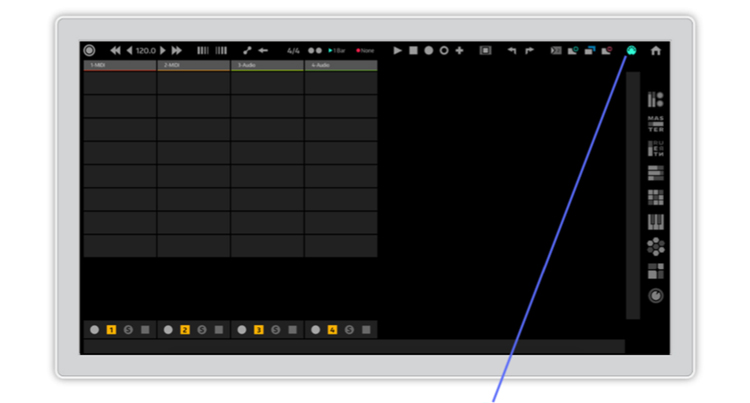
Step 1 – In Yeco, press the MIDI button to create a virtual MIDI port named 'YecoMIDI'
Step 2 – Go to Ableton's preferences: Live –>Preferences

Step 3 – On the preferences panel go to the MIDI settings
Step 4 – Under MIDI ports locate 'YecoOSC'
Step 5 – Set the Track and Remote buttons to the “on” position
THAT'S IT! We hope you enjoy using Yeco